Posts Tagged ‘Gluten-free’

Cooking With Sin Goes Lite – Salsa Fuego con Tequila

Posted on: July 30th, 2014 by Carla Johnson No Comments

“Tequila, firebug in the house of good taste; O tequila, savage water of sorcery, what confusion and mischief your sly, rebellious drops do generate!” ― Tom Robbins, Still Life with Woodpecker

Let me share another recipe from my healthier-but-still-sinful regimen.

It may not make a difference, but I think pairing your “sin” with the cultural roots of the recipe makes sense. So, I thought I’d try making a salsa flambéd with tequila. It was delicious. Plus, we just got back from a holiday in Dominican Republic and I’m enjoying my freshened up Español. In case you don’t know, “Salsa Fuego con Tequila” means Fire Salsa with Tequila.

With the carbs and sugars reduced in my diet, I have found myself turning up both the flavours and the heat. A few snappy jalapeños sure help make a meal more interesting and every salsa needs a good shot of fresh cilantro.

Carla Johnson author Cooking With Sin Goes Lite Light

Lite Salsa Fuego con Tequila

 
1 tablespoon olive oil
5 small tomatoes (I used brownish Kumatos)
6 green onions
12 cloves garlic, skin on
4 jalapeno peppers
1 sweet pepper, cut into large pieces
2 ounces 100% agave tequila
1 large, fresh avocado, chopped
1/3 cup fresh cilantro, chopped
salt
 

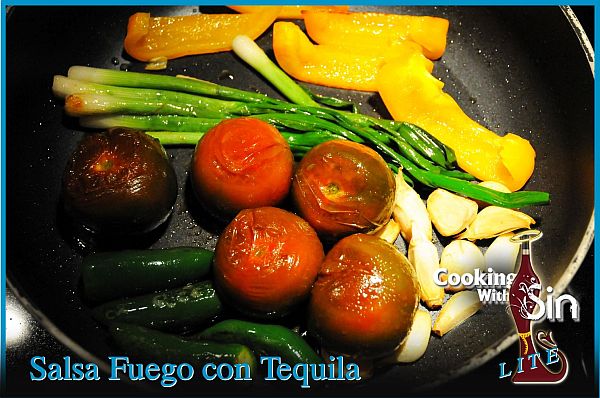
1. Place the tomatoes, onions, garlic and peppers in a large non-stick pan (with a tight-fitting lid on stand-by) and drizzle with olive oil. Gently cook/fry the vegetables for approximately 5 minutes to soften.

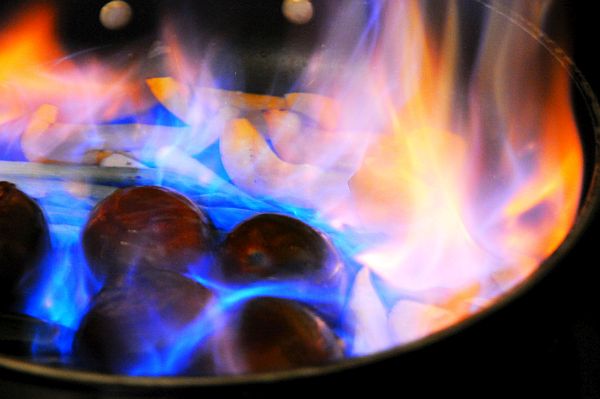
2. Splash the tequila over the vegetables and light. Flambé the entire pan, turning each vegetable until the skins blister. This may just take a couple of minutes then douse the flames by covering the pan with the lid.

Carla Johnson author Cooking With Sin Goes Lite Light

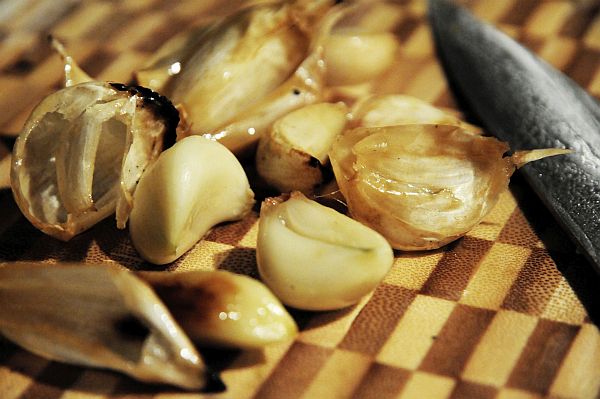
3. Slide off the skins of the garlic cloves. They will come off really easily now.

Carla Johnson author Cooking With Sin Goes Lite Light

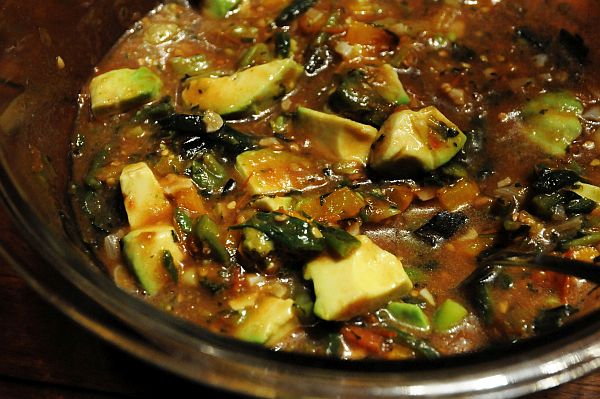
4. Loosely chop up all the vegetables right in the pan. The garlic and other firmer vegetables will need to be cut on a cutting board and returned to the pan. Stir in the avocado and cilantro. Transfer to a bowl and let the salsa cool.

Carla Johnson author Cooking With Sin Goes Lite Light

4. For a flavour boost, I saved some fresh cilantro to stir in just before serving it.

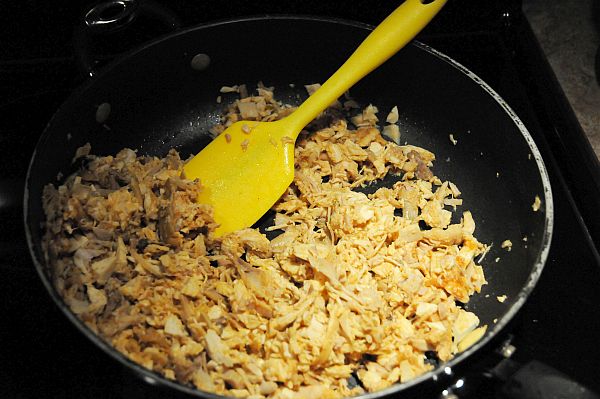
5. I suggest serving the salsa by generously spooning it over shredded grilled chicken breast – to which I also added some tequila for liquid. This creates a balanced low-carb meal of protein and vegetables. And if you have family or friends joining you, they can wrap it all up with shredded cheese in tortillas.

Carla Johnson author Cooking With Sin Goes Lite Light

 Buen Apetito!

Carla Johnson Cooking With Sin

Carla Johnson Cooking With Sin


“Happy Canada Day!” Red & White Nachos

Posted on: July 1st, 2014 by Carla Johnson No Comments

“How is it that everyone on this train has so much alcohol?”
“We always head to Canada at the beginning of the season,” she says taking her seat again. “Their laws are much more civilized. Cheers.” ― Sara Gruen, Water for Elephants

Carla Johnson author Cooking With Sin

Today is Canada Day! July 1st marks the 147th birthday of my country and we celebrate loud & proud! While we remain a relatively young country, we are a deeply patriotic nation. Don’t let the politeness fool you! Polite “waters run deep.” We need to behave ourselves to endure long cold winters, but we sure know how to bust out when the sun warms things up.

Carla Johnson author Cooking With Sin

My daughter, a “few” years ago, on Canada Day.

In light of our cold winter climate, my daughter pointed out today that we are really lucky our national birthday is in the summer. She’s smart! (For those readers who think we live in igloos and have snow year-round, you would be well-informed to know I am sitting outside in my red t-shirt and white shorts. The temperature has cooled down to 27°C or 81°F.) Today is a day of fireworks, parades, music and lots of revelry. Mostly, it involves lots of eating and, of course, drinking.

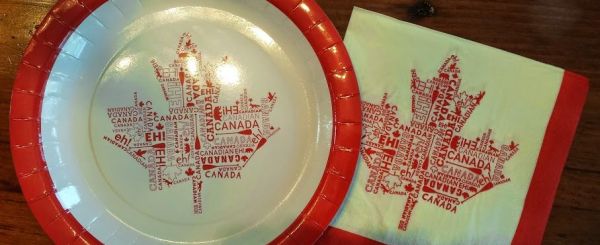
Carla Johnson author Cooking With Sin paper plate plates napkin napkins

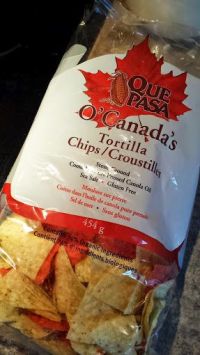
To celebrate this great day, I made Red & White Nachos for my family and they were awesome. Usually I just cheat and warm the nachos in the microwave, but this time I decided to do it right and warmed them in the oven. Not only were the nacho chips red and white, but so was the meat. I topped it with white chicken meat and red pepperellos. Of course, I made sure the mound had cheese layered throughout. Mmm… it was Canadian goodness. :)

Carla Johnson author Cooking With Sin


“Happy Canada Day!” Red & White Nachos

 
Red & white nacho chipsCarla Johnson author Cooking With Sin
Canola oil
Garlic cloves, minced
Chicken breast meat, cooked & chopped
Pepperellos or pepperettes, chopped into thin slices
Green onions, chopped
Tequila or whisky
Salsa
Monterey Jack cheese with  Jalapeño, shredded
Marble cheddar cheese, shredded
Red & green  jalapeños, sliced (optional)
 

1. Pre-heat the oven to 350°F.

2. In a large pan, sauté garlic in the oil along with a sprinkle of tequila (or a Canadian whisky). Add the meat and white part of the green onions to stir to warm them up. Sprinkle a spoon of salsa followed by a few handfuls of cheese and warm until the cheese melts.

3. Spread the bottom of a pan (I used my round pizza pan) with a layer of nacho chips and top with the warmed meat and a few more handfuls of shredded cheese. Top with another layer of nacho chips, meat and more shredded cheese.

Carla Johnson author Cooking With Sin

Ready for the oven

4. Heat the beautiful mound in the oven for 10 minutes (approx.) then top with the green part of the onions and jalapeños. Serve with more red & white – salsa & sour cream!

Carla Johnson author Cooking With Sin

Yup! All done!

Carla Johnson author Cooking With Sin

Oh Canada!

Did you know our Canadian flag is only 49 years old? In 1965 it was inaugurated after spending a year with politicians debating the many submissions that came in from across the country. See Prime Minister Lester B. Pearson’s design that started the debate along with several others, some of which were …ahem… unique.  “Awesome Canadian Flag Designs that Got Cut.

Carla Johnson Cooking With Sin

Carla Johnson Cooking With Sin

“Presidential” Gluten-n-Dairy-Free Mushroom Pot Pie

Posted on: July 12th, 2012 by Carla Johnson No Comments

 “I’m going to throw caution to the winds and have a sweet sherry.” – Alan Bennett’s character Joyce Chilvers in the movie “A Private Function.”

Lauren Hoover-West

Cooking With Sin has some interesting connections. Chef Tim Wasylko, the creator of “Stuck on Reduction” Grilled Watermelon Salad has cooked for our Canadian Prime Minister. Now I get to share a recipe from someone who has cooked for U.S. political leaders.

Looking at my stats here, I was surprised to see how many people were looking for vegetarian recipes, but I knew that most of my vegetarian recipes were for sweets. So, I put a request on LinkedIn to find a vegetarian, gluten-free recipe that was a savoury. Lauren Hoover-West responded.

Lauren Hoover-West trained at The California Culinary Academy then worked as a pastry chef for some of the top restaurants in the United States. During her time at the Hyatt in Indian Wells, she was honoured to prepare food for 4 U.S. Presidents and a U.S. Senator.

Lauren went on to become a culinary school instructor and while she was working on her Psychology degree, she was diagnosed with food allergies. Always looking for opportunities to be creative in the kitchen, she started converting and testing recipes to work with her new diet of no gluten, no dairy and no refined sugar. She happily shared her food and recipes with her classmates who were a great source of encouragement.

Enjoying her new found health, Lauren furthered her new cooking style by incorporating vegetarian recipes. She also does not use xanthan gum or guar gum in her cooking.

Carla Johnson "Cooking With Sin"

 “Presidential” Gluten-n-Dairy-Free Mushroom Pot Pie

Yields: 1 pie, 6-8 servings

Step 1: Gluten-Free Pie Crust

This delicate, flaky pie crust can be made by hand, or in a food processor which is much faster. I learned how to make this from my Aunt. Her desserts are perfection and the whole family always looks forward to enjoying them at gatherings and holidays!

Yields: 2 single crusts

3 cups oat flour
½ teaspoon sea salt, fine
2 sticks vegan Earth Balance or 1 cup vegetable shortening, frozen and diced
½ cup iced water (bottled or filtered)

1. Put bowl and pastry cutter into the freezer while measuring out ingredients. Try to handle dough as little as possible. You want to keep the pieces of Earth Balance or shortening cold, which will make the crust flakey rather than tough.

2. Sift flour and salt into a large glass or metal mixing bowl or food processor. Add ½ cup shortening or 1 stick Earth Balance and cut into the flour with a pastry cutter, or pulse with food processor, until it is the size and texture of cornmeal.

3. Add remaining ½ cup shortening or stick Earth Balance and cut into the flour with cutter, or pulse with food processor, until it is the size of small green peas.

4. Slowly drizzle 1 Tablespoon of water at a time and blend just until dough forms a ball or comes together so it doesn’t break apart.

5. Take a tablespoon of dough, roll it out and if it cracks or falls apart, you need more water. If the dough is sticky, you added too much water. If it is too sticky, add 1-2 Tablespoons of flour. The humidity in the air will determine how much water you will need.

6. Cut dough in half and wrap in plastic and refrigerate or put into a freezer zip bag and freeze until ready to use. Thaw in refrigerator for 8 hours.

When ready to make the pie:

1. Between two pieces of plastic wrap or on a well-floured board, roll out the dough -when rolling dough, roll once with even pressure and turn a quarter turn and continue rolling and turning until it is ¼ inch thick. If it sticks, add more flour to board. Only roll out one time or it will become tough instead of flakey. Brush off any excess flour with a dry pastry or basting brush.

2. If using plastic remove the top piece of plastic and lift up the bottom piece of plastic holding the dough and flip it over into a pie pan and peel off the plastic.

3. If using a floured board, gently roll the dough around the rolling pin, start at the edge of the pie pan, and unroll it over the pie pan. If it sticks to the board, slide a long flat spatula under it.

4. Roll out remaining half of dough after you have filled the pie and are ready to bake it. Dough can be frozen up to 6 months if double wrapped in plastic and then put into a zip freezer bag. It will keep in the refrigerator for a few days.

Step 2: Gluten-Free, Dairy-Free Mushroom Pot Pie Filling

Portobello mushrooms have a meat like texture a make great vegetarian main dish!

1 small organic yellow onion, diced
1 cup sliced organic carrots
4 stalks organic celery, sliced
2 large Portobello mushrooms, cubed or 4 cups crimini mushroom caps, halved
1/3 cup dry sherry
1 cup organic frozen petite green peas
1 bunch organic flat Italian parsley, chopped
4 Tablespoons organic oat flour
4 Tablespoons organic grape seed oil or extra virgin olive oil
2 cups organic vegetable stock or broth
salt/pepper to taste
2 teaspoons dried herbs (thyme, basil, savory, marjoram or your favorite)
1 recipe of pie crust, unbaked

1. Preheat oven to 375° F. Roll out half the pie dough to ¼ inch thick and about 1 inch wider than your pie pan, place in pie pan, refrigerate for 30 minutes or more. Keep the other half of dough refrigerated.

2. In a large pot, sauté onions, carrots, celery and mushrooms over medium high heat until soft. Add ¼ cup dry sherry and cook for 1 minute until liquid has cooked down.

3. In the same pot add oil and flour and whisk over medium high heat until bubbling and then cook an additional 2 minutes. Slowly add the vegetable stock while whisking vigorously to avoid lumps.

4. Bring the pot to a boil and add all of the mushrooms, vegetables, frozen green peas and chopped parsley. Add herbs, pepper and salt if needed. Mix everything together and pour into pie pan lined with dough.

5. Roll out remaining half of dough about 1 inch wider than pie pan, cut a ½ inch hole in the middle and place over the top of the pie, and crimp the edges as you like.

6. For fewer calories, omit the bottom crust. Bake pie on the middle rack for 1 hour or until it is bubbling in the middle. Remove from oven, let it cool for 5-10 minutes, serve and enjoy.

7. This will keep in the refrigerator and make great leftovers for a few days. Do not freeze after baked. If you want to make it ahead, you can freeze it before you bake it and just bake it while frozen, but add more cooking time.

Enjoy!

Lauren has appeared and cooked on “ABC Live” in Chicago and Sacramento. She has cooked for 4 United States Presidents and a United States Senator.

Lauren Hoover-West was classically trained at The California Culinary Academy. She is a Chef/Educator/Consultant specializing in food allergies and health issues, including Diabetes, Autism, Celicac Disease, Autoimmune diseases and inflammatory conditions. Lauren has created a revolutionary way to cook delicious food that is gluten-free, dairy-free, low glycemic index and very healthy.

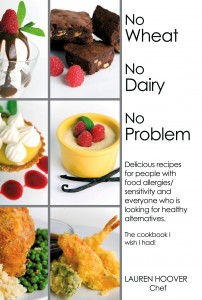
She is the author of No Wheat No Dairy No Problem cookbook and blog site. She has 20 years of cooking and teaching experience at La Folie (Michelin star), Fairmont, Hyatt Resorts, Bally’s, Marriott etc… Lauren is the owner of Lauren’s Kitchen Biscotti Company. She also earned a Bachelor of Science in Psychology. For more information go to her blog www.NoWheatNoDairyNoProblem.com.
“Not From Your Grocery Store” Icewine Marshmallows

Posted on: June 9th, 2012 by Carla Johnson No Comments

Carla Johnson "Cooking With Sin"“You’re a marshmallow. Soft and sweet and when you get heated up you go all gooey and delicious.” ~ Janet Evanovich, One For The Money

For most of my life I thought marshmallows were the simple candy treat you buy in a bag at the grocery store. Simple and inexpensive, they make great rice crisp treats and I love roasting them for S’mores over campfires at our family cabin.

Camping enthusiasts know that roasting a marshmallow on a stick over the coals of an open fire is truly an art. You want a crispy, toasty brown colour on the outside and slightly melted, warm & soft on the inside, but the temperature must be not be too hot. A burnt lip or tongue will definitely spoil the fun.

I also have a soft spot on my palate for the chocolate covered, heart-shaped marshmallows on a stick you can buy at the corner store for Valentine’s Day. A few years ago, my eyes were opened to a whole new marshmallow landscape when I found out that Reid Chocolates, our local, wonderful chocolatier made their own marshmallow for their seasonal treats. Their soft, tasty chocolate-coated sweets took marshmallow to a whole new level. I was a convert!

Chef Jason Parsons, Executive Chef at Peller Estates Winery Restaurant and the creator of this recipe, claims it is a fool-proof recipe, but I was still really happy that my friend Connie Campbell tested the recipe instead of me. She is a passionate, brilliant chef. If you know me, I don’t even consider myself a proper cook. Connie did a great job and you can read about it on her blog post “Icewine Marshmallows… or should I say Marshmellow…?

I didn’t ask Connie if she would use them in S’mores, but I think a light coating of chocolate might be perfect.

Carla Johnson "Cooking With Sin"

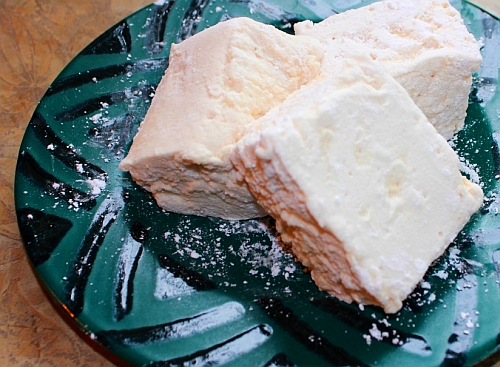
Icewine Marshmallows - all photos on this post are courtesy of Connie Campbell

“Not From Your Grocery Store” Icewine Marshmallows

 
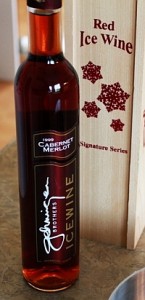
3/4 cup Icewine (Connie used red)
3 envelopes unflavoured gelatin
3/4 cup water
2 cups sugar
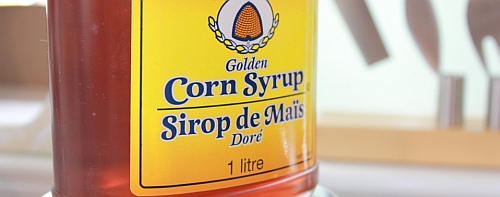
2/3 cup corn syrup
1/4 teaspoon salt
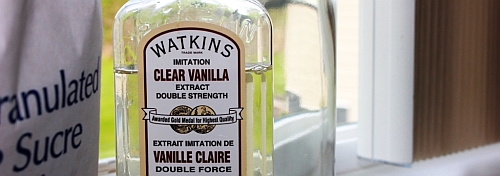
1 tablespoon vanilla (Connie used a clear vanilla)
¼ cup icing sugar (more if needed)
 
Carla Johnson "Cooking With Sin"
 
  1. Line a 9-inch square pan with oiled plastic wrap.
  2. Pour Icewine in a small saucepan over medium heat and simmer for several minutes until reduced to approximately 4 teaspoons. It will be a thick syrup. Watch closely to prevent scorching. Let cool.
  3. In a mixer bowl, pour 1/2 cup of water and sprinkle with gelatin. Let stand 10 minutes to let it soften.
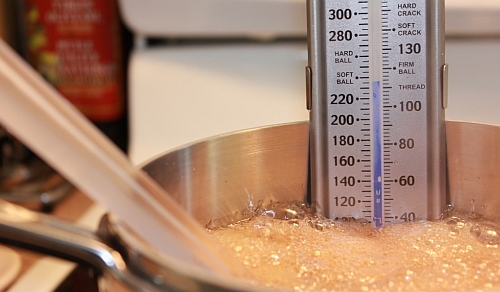
  4. While the gelatin sits, combine remaining water, sugar and corn syrup in a saucepan. Bring to a boil until it reaches 240°F the “soft ball” candy stage.
  5. Stir the sugar-syrup mixture into gelatin mixture along with the salt. Beat with whisk on high speed for eight minutes.
  6. Add the reduced Icewine and vanilla. Continue beating for 2 more minutes.
  7. Transfer mixture to the lined pan. Use an oiled spatula to spread evenly.
  8. Allow to set several hours in a cool area, but non-refrigerated.
  9. When the marshmallow mixture is firm, remove from the pan. Cut into squares with a lightly oiled knife and coat each square in icing sugar.

Tip! When you cut the marshmallow be sure to pull the pieces apart or they will join back together again becoming “uncut.”

Carla Johnson "Cooking With Sin"

Carla Johnson "Cooking With Sin"

Carla Johnson "Cooking With Sin"

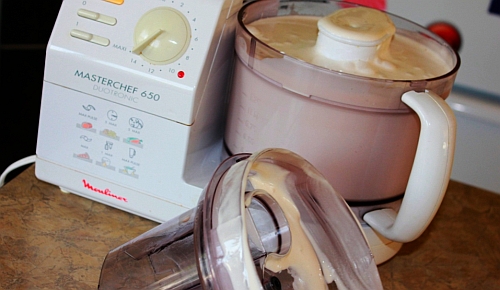
The marshmallow mush took over Connie's food processor!


Carla Johnson "Cooking With Sin"

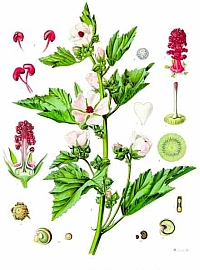
The Marshmallow plant

Marshmallow probably first came into being as a medicinal substance, since the mucilaginous extracts come from the root of the marshmallow plant, Althaea officinalis, which were used as a remedy for sore throats. Concoctions of other parts of the marshmallow plant had medical uses as well. The root has been used since Egyptian antiquity in a honey-sweetened confection useful in the treatment of sore throat. The later French version of the recipe, called pâte de guimauve (or “guimauve” for short), included an egg white meringue and was often flavored with rose water.Pâte de guimauve more closely resembles contemporary commercially available marshmallows, which no longer contain any marshmallow plant. The use of marshmallow to make a sweet dates back to ancient Egypt, where the recipe called for extracting sap from the plant and mixing it with nuts and honey.

~ Wikipedia “Marshmallow”

Gin & Tonic Sorbet

Recently, Connie sent me a picture of a recipe she and a friend found online for Gin & Tonic Sorbet. They tried it out and found it “yummy and very sweet.” I told her that at some point we need to publish “Cooking With Sin With Connie” because she is such a rich source of interesting food and recipes.

Carla Johnson "Cooking With Sin"

G & T Sorbet

  • 400ml cold water
  • 300g caster sugar
  • 300ml tonic water
  • gin to taste – around 50ml
  • juice of 2 lemons
  • 1 tablespoon glucose (optional)

 Carla Johnson "Cooking With Sin"

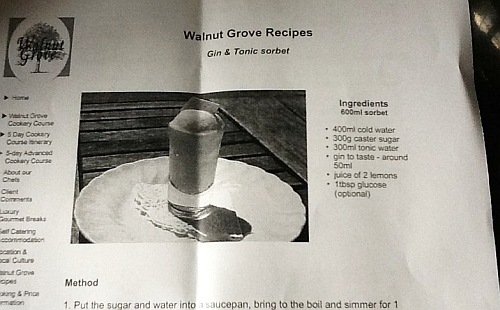
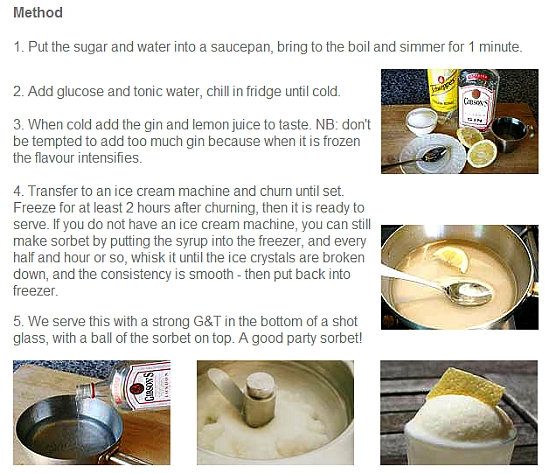
Here is the original recipe from Walnut Grove Cookery in France.

See Connie’s other posts here on “Cooking With Sin”

“Oops I Did It Again” Bouillabaisse

“Good Neighbour” Gluten-Free Beer Braised Beef

“Family Favourite” Banana Flambé

Posted on: June 2nd, 2012 by Carla Johnson No Comments

“At times our own light goes out and is rekindled by a spark from another person. Each of us has cause to think with deep gratitude of those who have lighted the flame within us.” ~ Albert Schweitzer

A few weeks ago, I stayed late at the dentist office. Most people want to get out as quickly as possible, but Michele, the administrative assistant and I got to talking and we didn’t want to stop.

For many years, Michele has been a warm, friendly voice on the answering machine reminding us about our appointments and her warm smile has always welcomed us like family at each appointment. Over the years I enjoyed hearing about the adventures of her 3 children as they have grown and are now off to college and Michele has watched our daughter grow up from a toddler playing with the train set in the waiting room, to the independent teenager she is now.

At my last appointment, we started talking about food. Michele’s real passion in life is creating and serving exquisite food. She comes by it naturally. Her great aunt was June Jacques, the matriarch to the Jacques family who owned the very popular Knotty Pine restaurants here in Cambridge and Waterloo, Ontario.

The Knotty Pine restaurants were famous for their Buttered Almond Cake. People came from all over the province to enjoy a slice. You can find recipes online that claim to be the original, but Michele reassures me that the original Buttered Almond Cake recipe, along with all their recipes, remains under lock and key. The family has never released any of their recipes to the public.

As Michele and I chatted that evening, she told me about her favourite recipes and all the foodies in her family. We were having so much fun that her husband who arrived to pick her up had no choice but to join us. We came up with great ideas for more restaurants and more cook books. It was great fun!

This is an old family favourite enjoyed at our family cottage for forty-some odd years. I watched my mom make it for friends while entertaining and I in turn made it for friends when I grew up. Everyone simply loves it!  ~ Michele

Family Favourite Banana Flambé

 
6 or 7 bananas, sliced
1/2 cup butter
1/3 cup orange juice
2 teaspoons cinnamon
3 tablespoons brown sugar
3 tablespoons Grand Marnier
  1. In a large sauté pan melt butter over med heat.
  2. Add sliced bananas, orange juice, sprinkle with cinnamon and brown sugar. Quickly toss over medium to high heat until butter and sugar thickens (about 2-3 min).
  3. Turn burner to high, drizzle Grand Marnier over bananas and ignite with flame! A lighter with a long handle is the safest option to ignite it with.
  4. Quickly toss over high heat. The flame will go out within 30 seconds.
  5. Remove from stove and immediately serve over vanilla ice cream or gelato.

Tip: Michele uses amber rum when she doesn’t have Grand Marnier available.

Simply Delicious!

Excerpt from Wikipedia article on Flambe

Procedure

Simply lighting food on fire is not flambéing in and of itself. Igniting a sauce with alcohol in the pan changes the chemistry of the food. Because alcohol boils at 78 °C (172 °F), water boils at 100 °C (212 °F) and sugar caramelizes at 170 °C (338 °F), ignition of all these ingredients combined results in a complex chemical reaction, especially as the surface of the burning alcohol exceeds 240 °C (500 °F).

Because of their high alcohol content, some recipes recommend flambéing with liquors such as Everclear or 151. However, these spirits are highly flammable and are considered much too dangerous by professional cooks. Wines and beers have too little alcohol and will not flambé. Rum, cognac, or other flavorful liqueurs that are about 40% alcohol (80 USA proof) are considered ideal. Cinnamon, which is ground from tree bark, is sometimes added not only for flavor, but for show as the powder ignites when added.

4 Women Holding Bananas. Really!

If you liked this recipe…  Mother-Daughter Butterscotch Bananas is a similar recipe. Bananas & ice cream seem to bring families together.